Simple Quiz App using HTML, CSS and Javascript

Software Engineer | Backend Engineer | Devops Engineer
How is it going techies, in this video we will build a complete multi-option quiz app using HTML, CSS and Javascript only.
PREREQUISITES
- Code Editor: To continue please make sure to have any code editor of your choice installed, Visual Studio Code(VS Code) was used in this article, but you are free to use any code editor of your choice.
- Web Browser: We will also need a web browser, you can use any web browser of your choice, in this article Brave was used.
- Live Server(Optional): Live Server is a Visual Studio Code extension that reloads your webpage whenever the static files change. You don't have to use this extension to continue especially if you are not using VS Code.
Setup
- Create a folder on your computer and open it with your code editor.
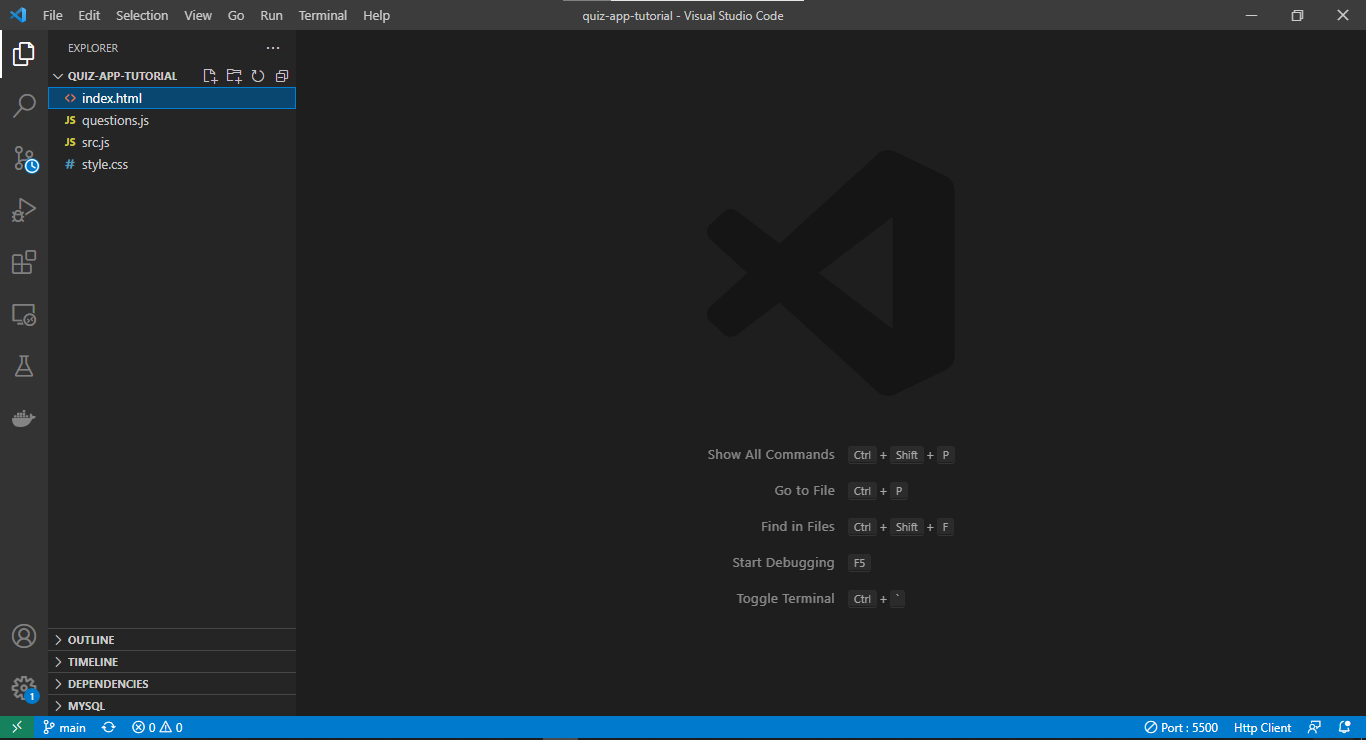
- Create 3 files in your workspace namely index.html, style.css, src.js and question.js. After this, your workspace should look like the image below(for vs code users).
- Open your index.html in your preferred browser, if you are using vscode and you have live server installed, click the Go Live link at the bottom right corner of your code editor. Live server will open your project on the browser and reload your webpage automatically when changes are applied to your code.
Now let's code!
1. In your index.html add the following
<!DOCTYPE html>
<html lang="en">
<head>
    <meta charset="UTF-8">
    <meta http-equiv="X-UA-Compatible" content="IE=edge">
    <meta name="viewport" content="width=device-width, initial-scale=1.0">
    <title>Quiz App</title>
    <link rel="stylesheet" href="style.css">
</head>
<body>
    <div class="main-wrapper">
        <div class="quiz-container" id="quiz-container">

        </div>
    </div>
    <script src="questions.js"></script>
    <script src="src.js"></script>
</body>
</html>
What's going on up here?
Nothing much, the code above is a simple html markup that is used to structure our page.
However there are some important things we should note, just before the closing head tag we have <link rel="stylesheet" href="style.css"> this is used to include our style.css in our html so that we can style it easily, right before our closing body tag we have
<script src="questions.js"></script>
<script src="src.js"></script>
The function of the code above is to include questions.js and src.js into our html file. We are loading the questions.js before the src.js because the src.js file depends on the questions.js, we will see this further in the article.
2. In your style.css include the following
.main-wrapper{
    font-family:Georgia, 'Times New Roman', Times, serif;
    width: 100%;
    height: 90vh;
    display: inline-flex;
    flex-direction: column;
    align-items: center;
    justify-content: center;
}
.quiz-container{
    background-color: rgb(231, 221, 221);
    box-shadow: gray 2px 2px 2px;
}
.quiz-container > div{
    margin: 20px;
}
.each-answer{
    margin: 10px 0%;
}
.prev-next, .jumper-button{
    padding: 5px 10px;
    margin: 2px 0%;
    background-color: blue;
    color: white;
    border: white 1px solid;
    cursor: pointer;
}
.active{
    background-color: white;
    color : blue;
    border: blue solid 1px;
}
.action-btns button:hover{
    background-color: white;
    color : blue;
    border: blue solid 1px;
}
.result-wrapper{
    display: inline-flex;
    flex-direction: column;
    align-items: center;
    justify-content: center;
}
.result-details{
    display: inline-flex;
    justify-content: center;
}
.result-details > div{
    margin: 20px;
}
What's going on up here?
The code above contains the basic design for our html page.
3. In your questions.js file add the following code.
const questions = [
{
question : "What is the name of this channel",
options : [
"Code Sculptor",
"Code Builder",
"Code Destroyer",
"Code Maker"
],
answer : "Code Sculptor"
},
{
question : "1 + 1 is?",
options : [
"2", "3", "5", "19"
],
answer : 2
},
{
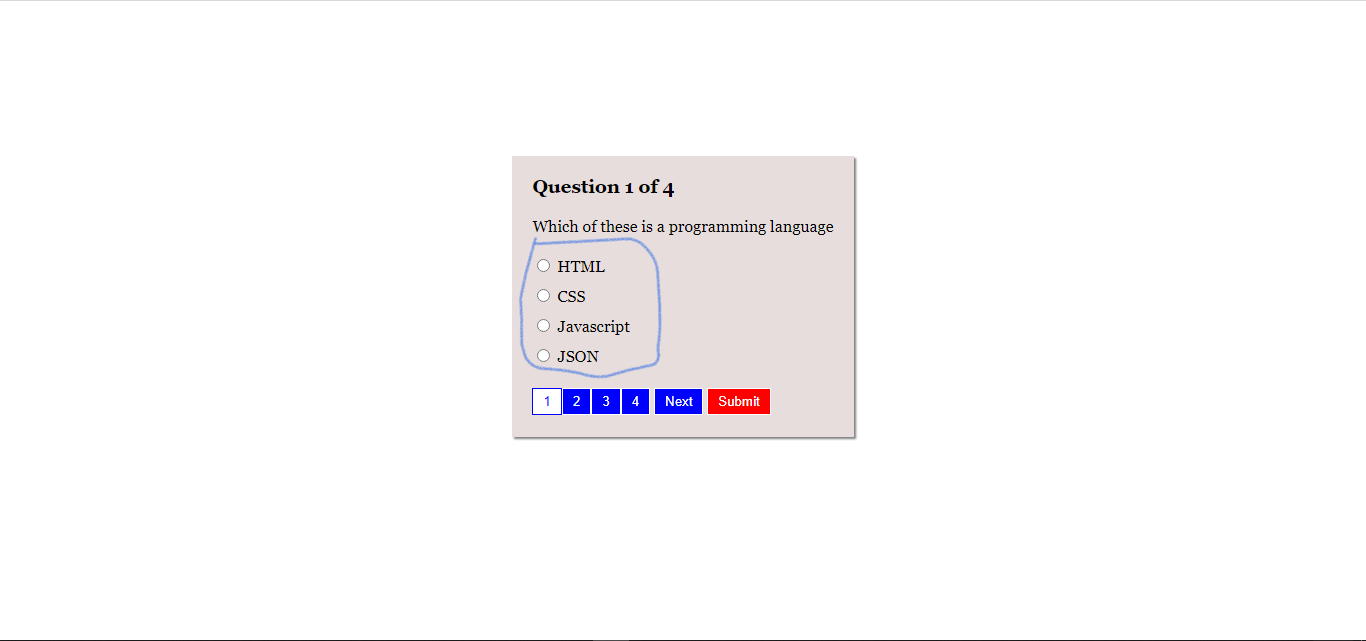
question : "Which of this is a programming language?",
options : [
"HTML",
"CSS",
"Javascript",
"JSON"
],
answer : "Javascript"
},
{
question : "What is my name",
options : [
"Femi Fatokun",
"David Shokunbi",
"Wale Adenusi",
"Daniel Adewale"
],
answer : "Femi Fatokun"
}
]
What's going on up here?
The code above only includes one variable questions, questions contains an array that contains objects. The objects are dummy questions that have the following keys :
questionoptionsan array of possible answers to the questionsanswerthe actual answer to the question
4. In your src.js file add the following code.
let quizContainer = document.getElementById("quiz-container");
let selectedAnswers = {};
let question;
let index;

const generateOptions = () => {
    let options = ``;
    for (let i = 0; i < question.options.length; i++) {
        let option = question.options[i];
        let selected = false;
        if(selectedAnswers[`${question.question}`] == option){
            selected = true;
        }
        options += `<div class="each-answer">
        <input type="radio" name="answer-btn" ${selected ? "checked='true'" : ""} onclick="addAnswer()" value="${option}">
        ${option}
        </div>`;
    }
    return options;
}

const generateJumpBtns = ()=>{
    let btns = ``;
    for(let i = 0; i < questions.length; i++){
        btns += `<button class="jumper-button ${i == index ? "active" : ""}" onclick="showQuestion(${i})">${i + 1}</button>`;
    }
    return btns;
}

const addAnswer = ()=>{
    let currentOptions = document.getElementsByName("answer-btn");
    for(let i = 0; i < currentOptions.length; i++){
        let currentOption = currentOptions[i];
        if(currentOption.checked == true){
            selectedAnswers[`${question.question}`] = currentOption.value;
        }
    }
}

const restartQuiz = ()=>{
    index = 0;
    selectedAnswers = {};
    showQuestion(0);
}

const submitQuiz = ()=>{
    let message = `Are you sure you want to submit?`;
    let answered = Object.keys(selectedAnswers);
    if(answered.length < questions.length){
        message += `\nYou have ${questions.length - answered.length} questions out of ${questions.length} unanswered`;
    }
    let ask = confirm(message);
    let attempted = 0;
    let correct = 0;
    let wrong = 0;
    if(ask){
        for(let i = 0; i < questions.length; i++){
            let question = questions[i];
            if(selectedAnswers[`${question.question}`] != undefined){
                attempted++;
                if(selectedAnswers[`${question.question}`] == question.answer){
                    correct++;
                }else{
                    wrong++;
                }
            }
        }
        quizContainer.innerHTML = `<div class="result-wrapper">
        <h3>Result</h3>
        <div class="result-details">
            <div>
                <div>Attempted</div>
                <div>${attempted}/${questions.length}</div>
            </div>
            <div>
                <div>Correct</div>
                <div>${correct}/${questions.length}</div>
            </div>
            <div>
                <div>Wrong</div>
                <div>${wrong}/${questions.length}</div>
            </div>
        </div>
        <button class="jumper-button" onclick="restartQuiz()">Restart</button>
    </div>`;
    }
}

const showQuestion = (i) => {
    index = i;
    if (questions[index]) {
        question = questions[index];
        let options = generateOptions(index);
        let jumpBtns = generateJumpBtns(index);


        quizContainer.innerHTML = `
            <div class="pointer-container">
                <h3>
                    Question ${index + 1} of ${questions.length}
                </h3>
            </div>
            <div>
                ${question.question}
            </div>
            <div class="answers-container">
                ${options}
            </div>
            <div class="action-btns">
                ${index > 0 ? `<button class="prev-next" onclick="showQuestion(${index - 1})">Previous</button>` : ""}
                ${jumpBtns}
                ${index < questions.length - 1 ? `<button class="prev-next" onclick="showQuestion(${index + 1})">Next</button>` : ""}
                <button class="prev-next" style="background-color : red;" onclick="submitQuiz()">Submit</button>
            </div>`
        ;
    } else {
        alert("Invalid question");
    }
}

showQuestion(0);
What's going on up here?
The above code is responsible for the behaviour of our quiz application, the code will be explained block for block. Let's go.....
Variable declaration(initialization)
let quizContainer = document.getElementById("quiz-container"); let selectedAnswers = {}; let question; let index;quizContaineris assigned to thedocument.getElementById()method,quiz-containerwas passed as the aurgment of the method. The variable now represents<div class="quiz-container" id="quiz-container"></div>in our html structure.selectedAnswerscontains an empty object,{}, this variable will hold the answers we select while taking the test.questionwas initialized without any value, the variable will carry the question at any instance during the test.indexwas initialized without any value, the variable will later represent th index of the question we are currently answering in thequestionsarray.
generateOptions function
const generateOptions = () => {
    let options = ``;
    for (let i = 0; i < question.options.length; i++) {
        let option = question.options[i];
        let selected = false;
        if(selectedAnswers[`${question.question}`] == option){
            selected = true;
        }
        options += `<div class="each-answer">
        <input type="radio" name="answer-btn" ${selected ? "checked='true'" : ""} onclick="addAnswer()" value="${option}">
        ${option}
        </div>`;
    }
    return options;
}
 The function is responsible for generating the options elements for the current question. Here is a complete breakdown of what's going on inside the function.
optionsvariable, initialy this is just an empty string, but after our loop the variable will contain a list of elements that represents the options of a particular question.- Then we write a for loop to iterate through the options of the current question and then we perform the following operations.
- We check if an answer has been provided for that particular question before, using
if(selectedAnswers[`${question.question}`] == option){
            selected = true;
}
- Then we generate a DOM element and add it to our
optionsusing :
options += `<div class="each-answer">
        <input type="radio" name="answer-btn" ${selected ? "checked='true'" : ""} onclick="addAnswer()" value="${option}">
        ${option}
    </div>`;
- In the code above we added an
onclickevent listener for every option. The function will be explained later in this article.- At the end of our function we return the
optionsvariable.
generateJumpBtns function
const generateJumpBtns = ()=>{
    let btns = ``;
    for(let i = 0; i < questions.length; i++){
        btns += `<button class="jumper-button ${i == index ? "active" : ""}" onclick="showQuestion(${i})">${i + 1}</button>`;
    }
    return btns;
}
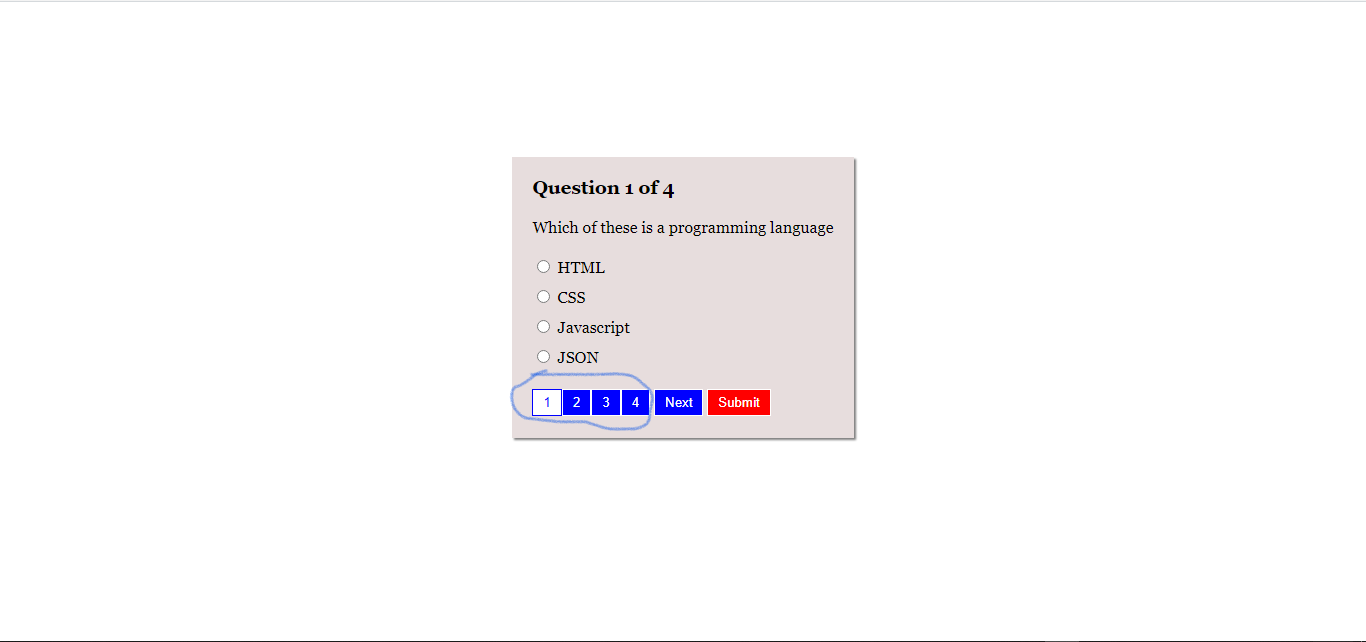 This function is responsible for generating the buttons that allows us to jump to any question of our choice. The operations in this function is expleained below :
btnsvariable, at first this function contains an empty string, but after our loop it should contains a list of elements that represents jump buttons.- Then we write a for loop that iterates through the length of questions available in the
questionsarray. Inside our loop we performed the following operations :
- Then we generate a DOM element that represents a jump button and append it to our
btnsvariable, using :btns += `<button class="jumper-button ${i == index ? "active" : ""}" onclick="${i != index ? `showQuestion(${i})` : ""}">${i + 1}</button>`;- In the code above we added an
onclickevent listener for every option. The function will be explained later in this article.- At the end of our function we return the
btnsvariable.
addAnswer function.
const addAnswer = ()=>{
  let currentOptions = document.getElementsByName("answer-btn");
  for(let i = 0; i < currentOptions.length; i++){
      let currentOption = currentOptions[i];
      if(currentOption.checked == true){
          selectedAnswers[`${question.question}`] = currentOption.value;
      }
  }
}
This function is responsibl for adding selected answer to the
selectedAnswersobject. In this case the question is the key and the answer is the value.- First we get all the elements will the name
answer-btnand assign it tocurrentOptionsvariable, this contain an array of DOM elements that have the nameanswer-btn. - Then we ran a loop to check the selected answer and add the answer to the
selectedAnswersobject using the question as thekeyand the answer selected as thevalue.
- First we get all the elements will the name
restartQuiz function.
const restartQuiz = ()=>{
  index = 0;
  selectedAnswers = {};
  showQuestion(0);
}
The use of this function is to restart the quiz by setting the
indexto 0,selectedAnswerto an empty object, and executingshowQuestion(0)to render the first question in ourquestions.submitQuiz function.
  const submitQuiz = ()=>{
  let message = `Are you sure you want to submit?`;
  let answered = Object.keys(selectedAnswers);
  if(answered.length < questions.length){
      message += `\nYou have ${questions.length - answered.length} questions out of ${questions.length} unanswered`;
  }
  let ask = confirm(message);
  let attempted = 0;
  let correct = 0;
  let wrong = 0;
  if(ask){
      for(let i = 0; i < questions.length; i++){
          let question = questions[i];
          if(selectedAnswers[`${question.question}`] != undefined){
              attempted++;
              if(selectedAnswers[`${question.question}`] == question.answer){
                  correct++;
              }else{
                  wrong++;
              }
          }
      }
      quizContainer.innerHTML = `<div class="result-wrapper">
      <h3>Result</h3>
      <div class="result-details">
          <div>
              <div>Attempted</div>
              <div>${attempted}/${questions.length}</div>
          </div>
          <div>
              <div>Correct</div>
              <div>${correct}/${questions.length}</div>
          </div>
          <div>
              <div>Wrong</div>
              <div>${wrong}/${questions.length}</div>
          </div>
      </div>
      <button class="jumper-button" onclick="restartQuiz()">Restart</button>
  </div>`;
  }
}
The function of the code above is to submit the quiz at any time, below is the sequence of operations performed in the function.
- First we created
messagevariable and we assignedAre you sure you want to submit?to it. - Then we created
answeredthis represents an array that contains all the keys in theselectedAnswersobject. The keys of the object are the answered questions. - We then wrote a condition to check if all questions have been answered, if not we include
\nYou have ${questions.length - answered.length} questions out of ${questions.length} unansweredin themessagevariable, this is to inform the user that they have not answered all questions. - We created a variable named
askthis contains a confirmation alert using the javascript inbuiltconfirmfunction and we also passedmessageas the aurgment. - Then we created three variable,
attempted,correctandwrongand we set their value to0; - Then we check if the user confirms that they want to submit. If yes we run the following operations :
- First we use a for loop to iterate through the
questionsarray. - For every iteration we run the following conditions.
- First we check if the current question is available in the
selectedAnswersobject. If yes we increment the value ofattempted. Then we check if the selected answer for that question is equal to the value of answer for that particular question in thequestionsarray. If yes, we increment the value of correct. If no, we increment the value of wrong.
- First we check if the current question is available in the
- After our loop we update the innerHTML of
quizContainerand set the value to a markup that represents the result.
- First we use a for loop to iterate through the
- First we created
showQuestion function.
const showQuestion = (i) => {
    index = i;
    if (questions[index]) {
        question = questions[index];
        let options = generateOptions(index);
        let jumpBtns = generateJumpBtns(index);


        quizContainer.innerHTML = `
            <div class="pointer-container">
                <h3>
                    Question ${index + 1} of ${questions.length}
                </h3>
            </div>
            <div>
                ${question.question}
            </div>
            <div class="answers-container">
                ${options}
            </div>
            <div class="action-btns">
                ${index > 0 ? `<button class="prev-next" onclick="showQuestion(${index - 1})">Previous</button>` : ""}
                ${jumpBtns}
                ${index < questions.length - 1 ? `<button class="prev-next" onclick="showQuestion(${index + 1})">Next</button>` : ""}
                <button class="prev-next" style="background-color : red;" onclick="submitQuiz()">Submit</button>
            </div>`
        ;
    } else {
        alert("Invalid question");
    }
}
The duty of this function is to simple render the question at a particular index onto our page. Below is a block-to-block explanation :
- The function recieved a parameter names
iand we set the value ofindextoi, remember index is a variable that was declared without a value at the top of our code.- Then we check if the question at that index is available in the
questionsarray. If no, we show an alert sayingInvalid question. If yes we run the following :
- We set the value of
questionto the value ofquestionsatindex, rememberquestionis a variable that was declared without a value at the top of our code.- Then we create the
optionsvariable and assign it togenerateOptions(index), this will generate the options for the question at the given index. Thereforeoptionsnow contains a list of option elements for the given question.- After that we create
jumpBtnsvariable and assign it togenerateJumpBtns(index), this will generate a list of jumper button elements for the list of questions available.- After these we update the innerHTML of the
quizContainerwith a markup that represents the current question, options and jumper buttons.- In our markup we also have
PreviousandNextbutton.
- The
Previousbutton will only render if theindexis greater than0, and when clicked it navigates to the previous question.- The
Nextbutton will only render if theindexis less that the length of thequestions, and when clicked it navigates to the next question.
At the end of our code
showQuestion(0);


